Being an optometrist is already a challenging job, and if you top that with management and patient’s booking, it could become stressful. But with an optician appointment booking system, things could get better.
And not just better, but stress free, joyful, and fun.
Therefore, in this tutorial, we’re going to see how you can add a scheduling system to your Optometry or eyecare business website.
That would allow users to make an appointment before arriving at the clinic for eye treatments or replacement of their broken glasses, and you’ll be able to more focused on your job.
What’s an Optician Appointment Booking System?
An optician appointment booking system for a website is a scheduling tool that provides you with the options to add a form with different fields that allow customers or patients to book an appointment directly from your optometrist website.

Using the optician appointment booking system, patients can choose the date and time they want to undergo a particular treatment or routine checkup. Can specify more details about their eye problem and even pay you the appointment fee if you integrate the appointment system with an online payment method.
Moreover, you can create appointment systems for optometrist services of different kinds, making it easier for patients to book an appointment for their specific eye problem.
What Are the Benefits of an Online Optician Appointment Booking System?
As 2.2 billion people are suffering from eye disease, then having an optician appointment booking system on your optometrist website can provide you lots of different benefits such as,
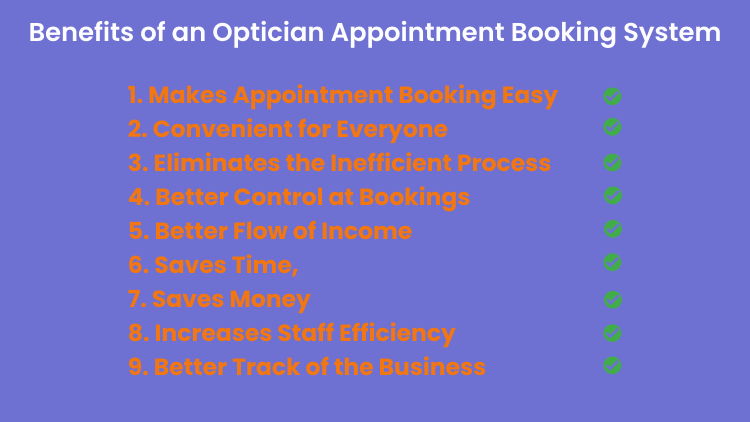
Eliminates the Inefficient and Conventional Process
The patient doesn’t have to call to book an appointment at an optometrists clinic, and you don’t have to spend your time answering their queries over the phone.
Better Control at Bookings
With an appointment booking system for your opticianry website, you’d know when and for what treatment patients have made the bookings and how you need to plan your schedule.
Better Flow of Income
If you integrate your appointment booking system with a payment method, then patients might pay you the treatment fee or appointment fee in advance.
Saves Time, Money and Increases Staff Efficiency
When there will be less time on the phone, there will be fewer bills to pay. You and your staff both will have extra and stress-free time to serve and treat your patients at a superior level, thus high efficiency of your staff and business as well.
Better Track of the Business and Its Processes
With an appointment system, you’d know what days your clinic is most occupied with customers. You’d better understand how to plan schemes and run marketing campaigns to grow the business.
Preview
Creating an Optician Appointment Booking System in WordPress
By following the below steps, you’d be able to create the optician booking system just like the above illustration.
Step 1: Install Contact Form 7
To get an appointment booking system on your WordPress optician website, we must first install a contact form builder plugin that would allow us to add a form with all the required fields.
Nevertheless, installing Contact Form 7 would be an excellent choice.

It’s a free WordPress contact form plugin that comes with lots of easy-to-use options using which you can easily create an appointment form in no time.
Fields you can add to your appointment booking form with Contact Form 7 are —
- Text
- URL
- Telephone Number
- Numbers
- Date
- Text Area
- Checkbox
- Drop-down menu
- Radio Buttons
- And more.
How to Install Contact Form 7 on Your Site?
- On your WordPress Dashboard, go to Plugins → Add New → search Contact Form 7, and click Install Now for the following.

- Once installed and activated the plugin, move to the next step.
Step 2: Create a New Date Calendar and Time Picker Field
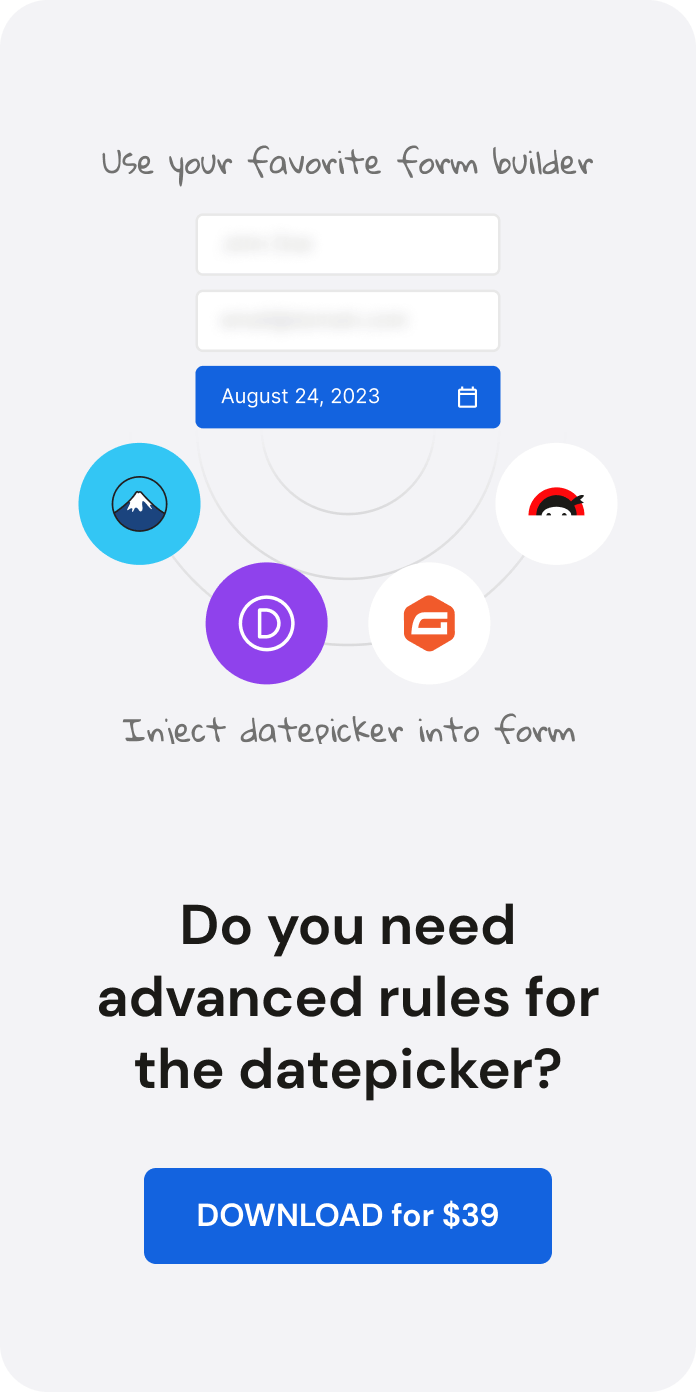
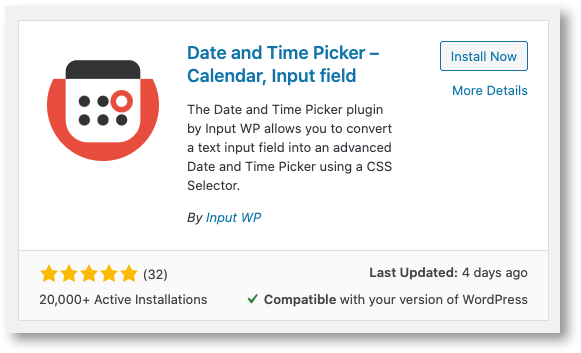
To add a date calendar and time picker to your WordPress appointment system that would allow users to pick a date and time on which they want to have their eye treatment, we need to create a date and time picker field. And for that, we need to install the Date and Time Picker plugin.
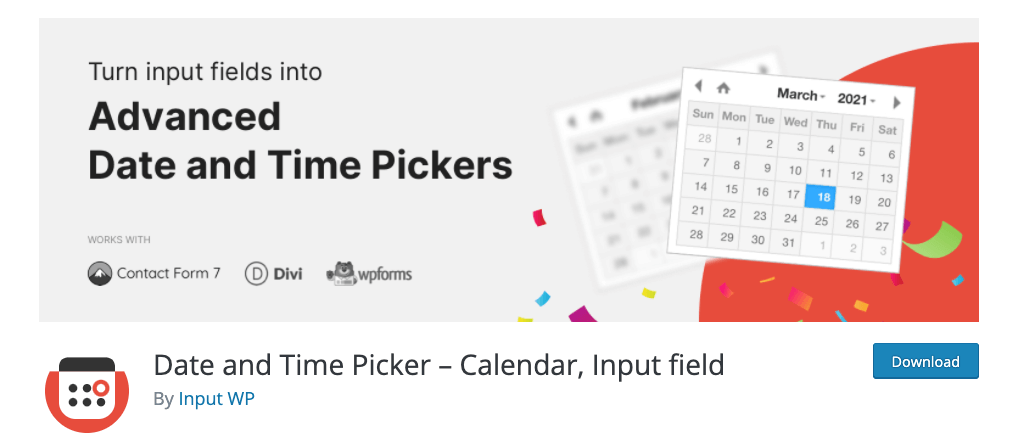
Just like Contact Form 7, it’s a free WordPress plugin that converts input fields into a date calendar and time picker using CSS Selector. So, users can easily choose the time and date on the form.
Moreover, using the features and options of this plugin, you can do a lot to your appointment form than just converting fields, such as,
- Disable past dates.
- Create open hours.
- Define date slot.
- Disable specific days and dates like weekends and holidays.
- Use it for different languages.
- Works fine with other contact forms like Contact Form 7, Divi, and WPForms.
- And much more.
Installing Date and Time Picker?
- On your WordPress Dashboard, go to Plugins → Add New → search Date and Time Picker, and click Install Now for the following.
Creating a Date and Time Picker Field
Now, after installing and activating the plugin, create a date and time picker field, so we can later use it on our optician appointment booking system to allow patients to choose a date and time for their eye treatment.
To do that, follow the below instructions,
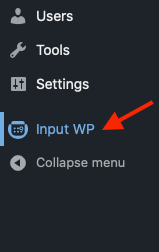
- On your WordPress Dashboard, go to Input WP.
- It opens Date and Time Picker’s settings with all the options to create a new field. Here, first select Date and Time picker, then in the CSS Selector, define your date and time picker field’s name.

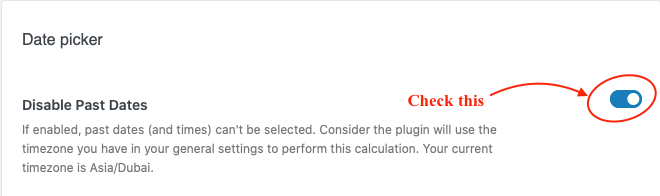
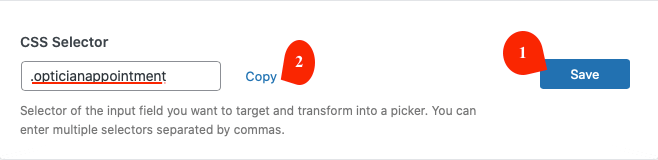
- Input the date and time picker CSS Selector with a dot (.) prefix. For example, ‘.opticianappointment‘ the same as the above screenshot. Then, scroll the page and disable past dates by checking the switch next to Disable Past Dates option in the Date Picker settings.
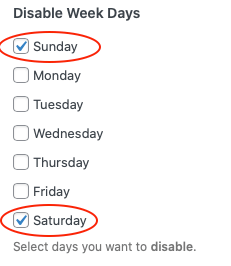
- Then, go to the Disable Week Days, and tick the checkbox next to Sunday and Saturday, if you’re keeping your optometrist clinic off on weekends.
- After disabling weekends, move to the Time Picker settings and input 60 in the Time Step option. It will display time in the time picker in 1-hour intervals.
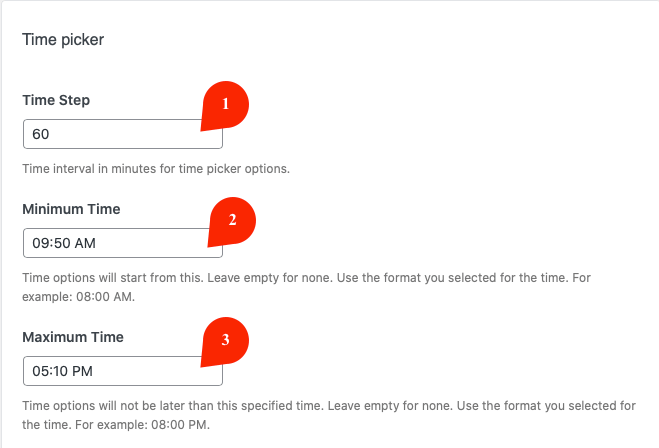
- Now, go to the Minimum Time and input 09:50 AM. Then go to the Maximum Time and input 05:10 PM. Doing so will only display patients time in the time picker between 10:00 AM to 05:00 PM. Good for showing when and how long the clinic is open.
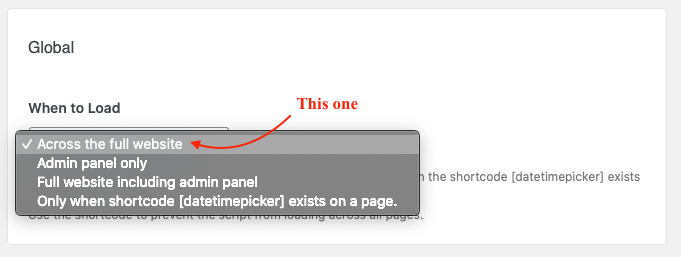
- Then, scroll down to Global settings, make sure When to Load is set to Across the full website.
- Once, this all is done, go back to the top, click Save and copy the CSS Selector.
Step 3: Install Material Design to Improve Appointment Form’s UI
If you go and create an appointment booking system for your optician website with Contact Form 7 only, then you’d find it little basic. You’ll have all your options there, but it won’t be too good if we talk about design specifically.
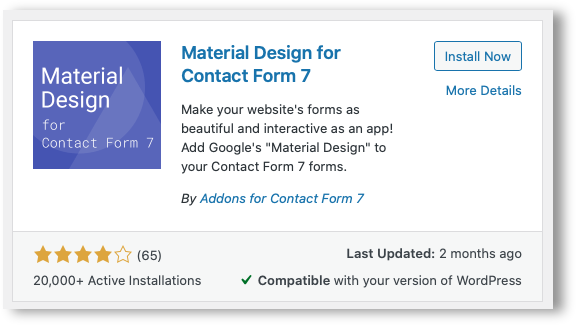
Therefore, to improve its design, we’re going to install another free WordPress plugin, Material Design for Contact Form 7, that would help us add a touch of modern design to our booking form.
- So, to do that, go to the Plugins → Add New, search Material Design, and click Install Now for the following,
After installing, and activating the Material Design for Contact Form 7, it will ask you to install some other plugin as well. Don’t do it for the moment, and move to the next where we’ll finally create our optician appointment booking form.
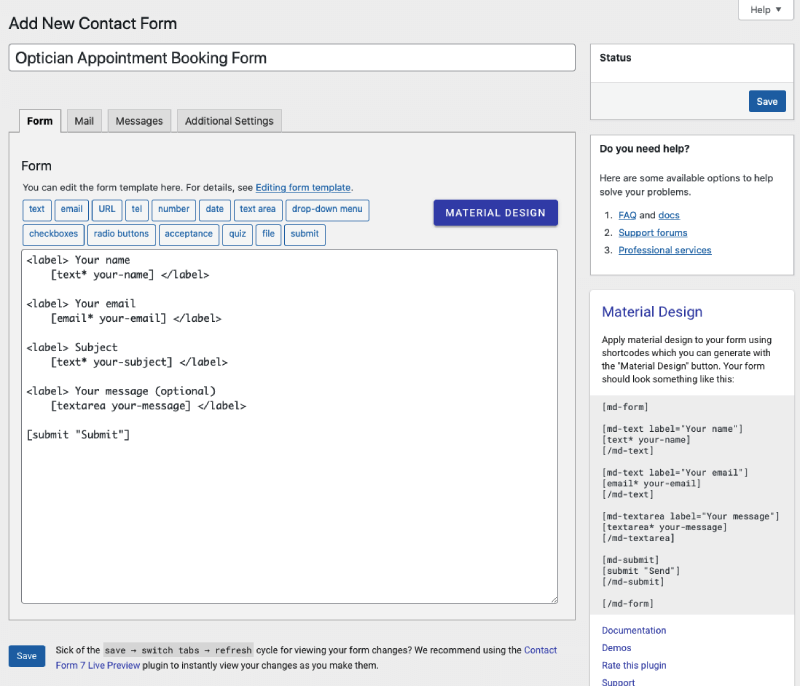
Step 4: Create a New Appointment Form
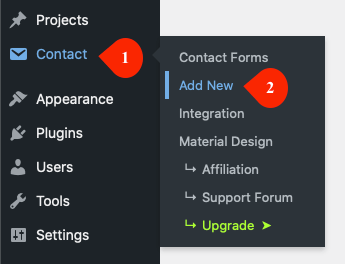
- On your WordPress Dashboard, go to Contact → Add New.
- It opens the form editor with pre-defined fields.
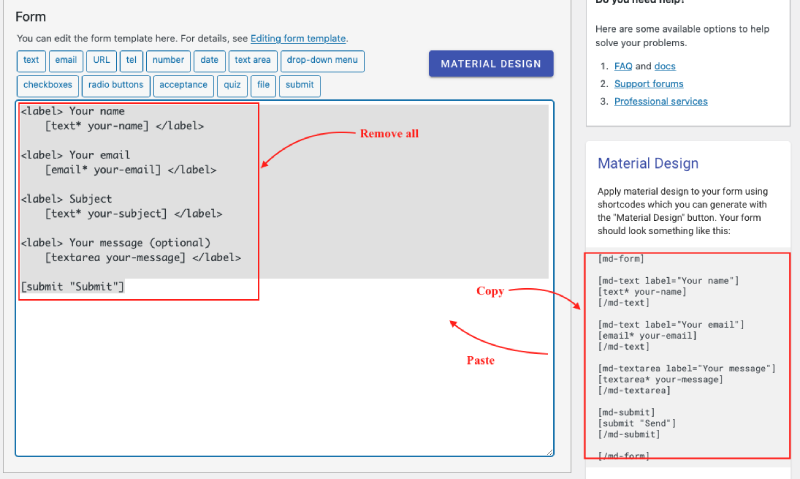
- Now, what you need to do is, remove all the predefined tags and paste the material design tags from the right sidebar.
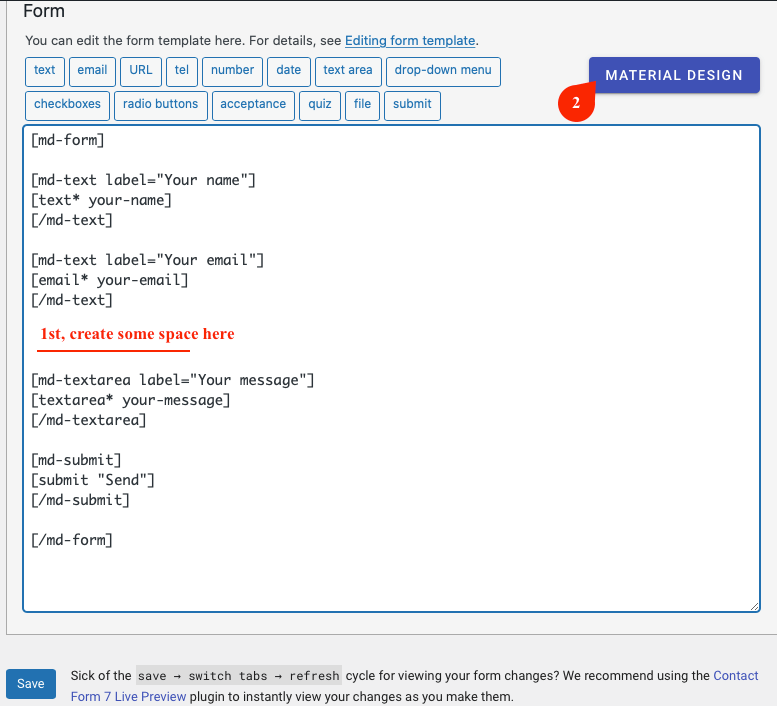
- Then, below the email field, create some space and click Material Design button.
- The Material Design will popup field options that you can include on your form. Click Text, then in the Label field, enter your field title. Add some help text, and click INSERT.
- It will insert the text field as the following,

- From here, what you need to do is remove the line in the double opening and closing curly brackets and insert the text field where the text cursor is. To do that, click the text at the top.
- It will open a new popup to add details about the input field. Now, to convert it as a date calendar and time picker, paste the CSS Selector in the Class attribute.
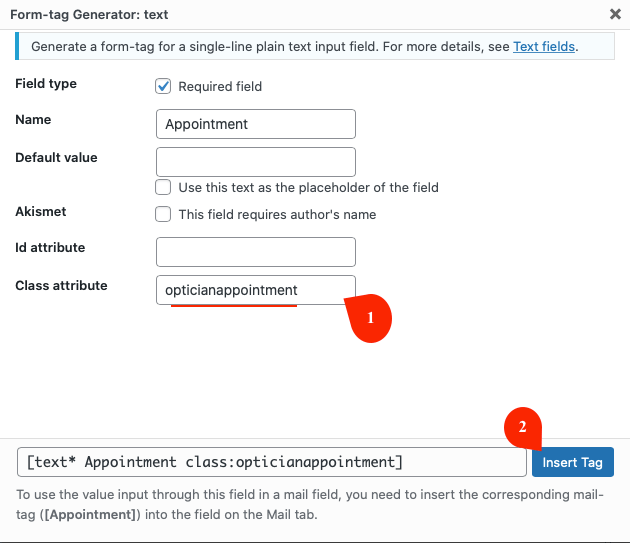
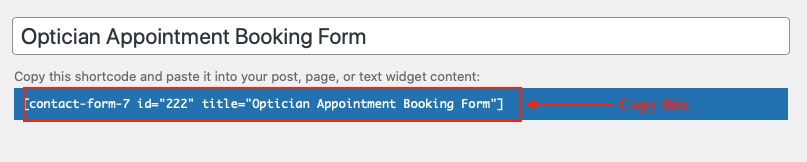
- Once added, click Insert Tag, then click Save and copy the shortcode.
- If you want to add more fields to your appointment booking system, you can do it with the help of Material Design. Once done adding enough fields, move to the next step.
Step 5: Publish Your Optician Appointment Booking System
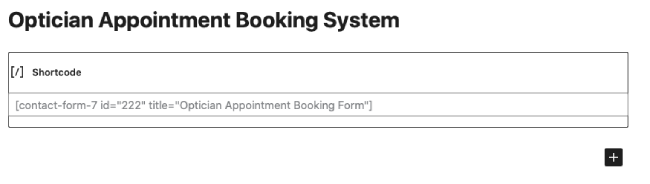
- Go to the page where you want to add an optician appointment booking system. Insert Shortcode Block and paste the Contact Form 7’s shortcode you’ve copied in the previous step.
- Once added, Update or Publish the page. Go and view it from the front-end; the optician booking form will look the same as the below illustration.
That’s it, you’ve successfully created an optician appointment booking form using Contact Form 7, Date and Time Picker and Material Design.
Improve Your Optician Appointment Booking System With a Payment Integration & Date and Time Picker Pro
With the above instructions, it is easy for you to now create an appointment booking system for your WordPress Optometrist website.
It would allow your website visitors to make a booking without calling or visiting the clinic easily. However, if you want to charge bookings, you need to integrate the form with a payment system.
Moreover, if you needed to simplify your bookings’ management, you can upgrade to Date and Time Picker Pro. It provides you with the options using which you can sync all your bookings with Google Calendar and other 3rd party bookings scheduling system. Plus, more design and date picker options.
Let us know what’s your thought about this tutorial, and if you already tried Date and Time Picker, how was your experience using it?