If someone searches for a travel agent near me and your travel agency website appears, then it’s essential that it should have a travel booking system on it.
Why?
Because over 1.46 billion international tourist arrivals happened worldwide between 2010 to 2019 to visit different places to spend their weekends, vacations or good times.
And with a travel reservation system on the site, you can help people find & visit good restaurants to drink and have nice conversations with their friends.
Or exquisite food places to let them enjoy a tasty meal over a beautiful date.
But that’s not all.
A travel agency website with a booking system on it can do much.

For example, you can provide travel packages to different locations, car rentals, fixed one way or round road trips, outdoor recreation activities, and much more.
And to do all; you need a travel booking system.
Therefore, in this tutorial, we’ll walk you through the easiest steps to create a travel booking system with WordPress and other useful tools.
So, you can make the most out of your travel agency website.
Let’s see how you can do that.
(1) Choose the Right WordPress Theme for Your Travel Booking System
If you’ve decided on a domain name and selected a hosting plan for your travel agency website, then the next thing you need to do is, install WordPress & choose a suitable WordPress theme.
There are lots of different WordPress themes available online. Still, it would be good for your business if you select a highly compatible theme to help you design a perfect travel agency website.
If you want to do this quickly, then you can try the following themes,
- Generatepress.
- OceanWP.
- Astra.
- Blossom Travel.
- Travel Eye.
- Vacation Rental.
Nevertheless, if you don’t want to go with the themes mentioned above, then when you go for a theme, consider these points,
- It is optimized for speed as a slow loading website doesn’t get much traction.
- Designed to customize at a higher level.
- Compatible with webpage builders like Elementor, Brizy, or Oxygen.
- Provides regular updates.
- And has a good client support system.
Once you’re done selecting your travel WordPress theme, move to the next step, where we’ll install a free plugin that would help you build your online travel booking system.
(2) Install Contact Form 7 to Let Customers Choose and Book Travel Services
A travel booking system includes a form that allows travellers to find the right travel package and book their trip.
Therefore, to create that travel booking form, we need to install a contact form builder plugin on our website.
And Contact Form 7 is one of the best WordPress contact form builders that makes it possible to easily create a form of any kind, including a travel booking form.
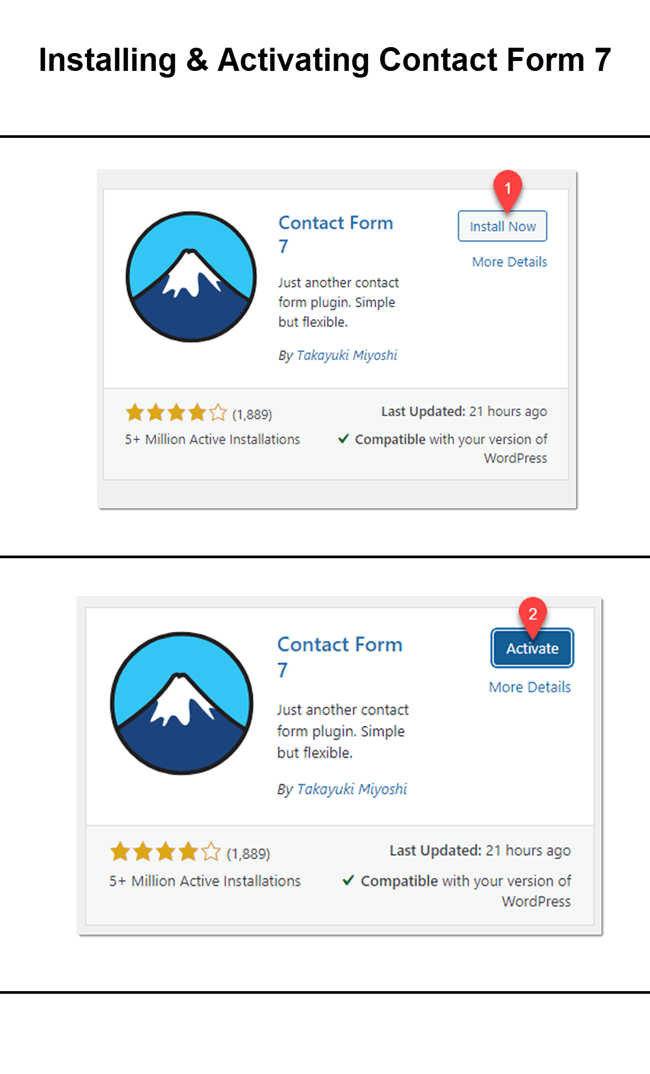
To install it, first, go to Plugins (on your WordPress dashboard) → Add New,
Then, search Contact Form 7, and click Install and later Activate for the following,
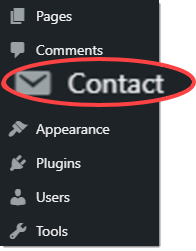
A new menu item will appear in the WordPress dashboard, titled Contact, just like the below screenshot.
(3) Create a Date Calendar & Time Picker
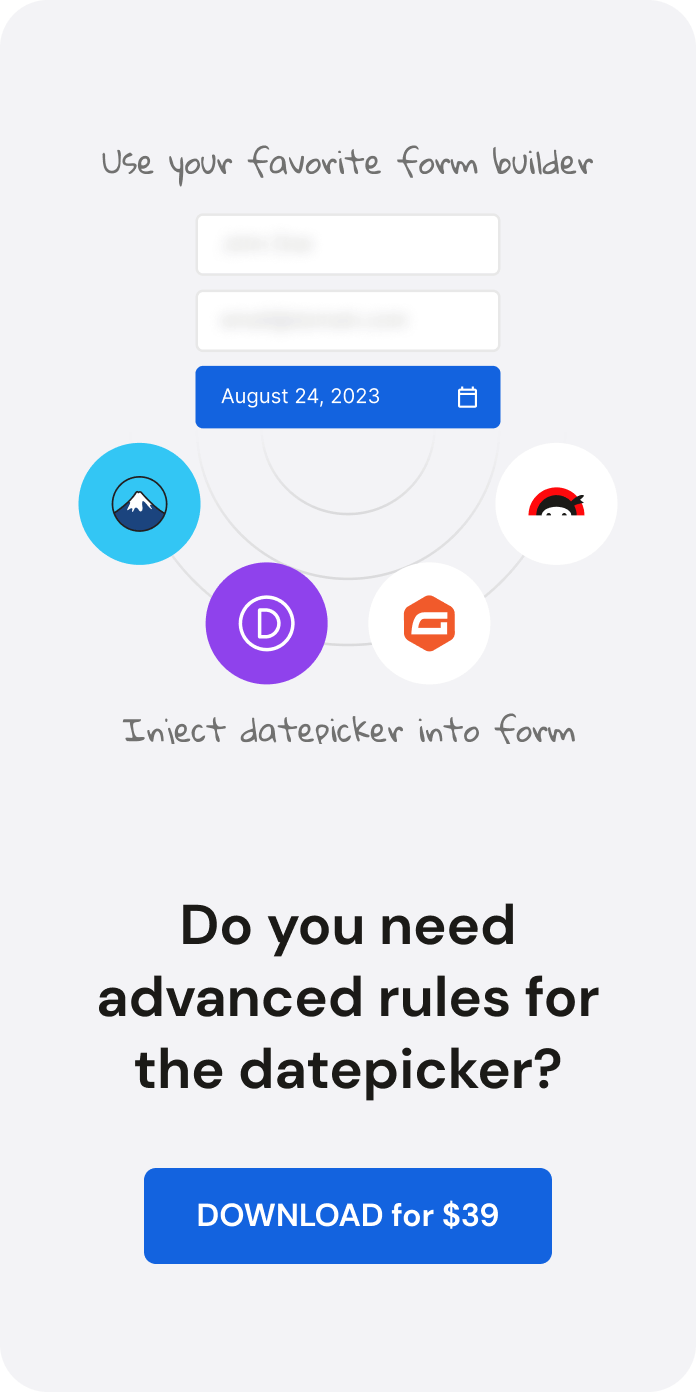
After installing the Contact Form 7 plugin, we need to install another plugin, Date and Time Picker.
The Date and Time Picker will help us add a date calendar and time picker for our travel reservation form. So, customers can easily select a date and time when they are planning for the trip.
To install it on the site, first, go to Inputwp.com, and get it.
After that, download the plugin file and go to the Plugins → Add New → Upload → click Choose File
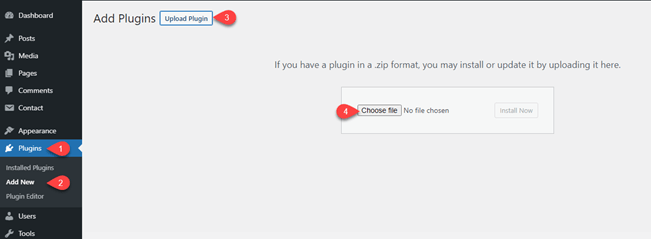
And browse the plugin file you’ve downloaded and upload it. And then click Install Now.
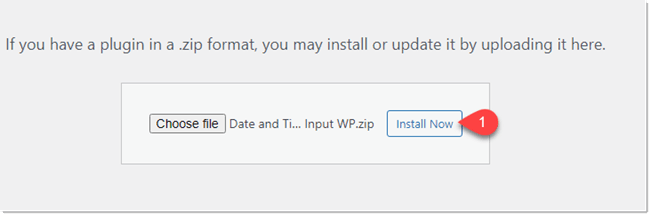
Once the plugin is installed, click Activate on the next window. Then, follow the next steps to create a Date and Time Picker field with a range.
(a) Create a Date and Time Picker Field
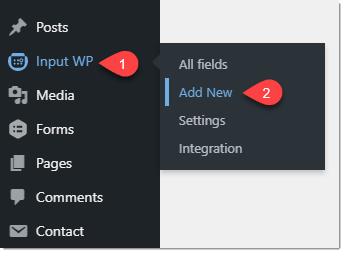
- Go to the Input WP (on your WordPress Dashboard) → Add New
- Enter field name at Add Title input field. Then scroll down to the Date Picker settings and enable the Disable Past Dates option.

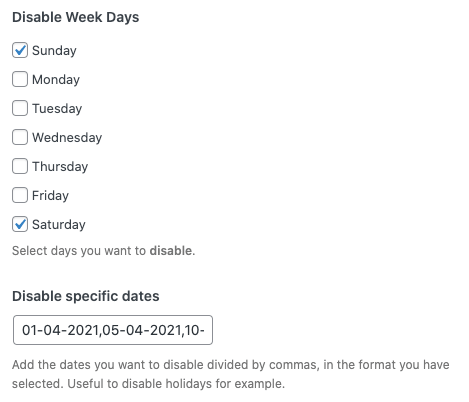
- Now, explore other settings available in the Date Picker. Apply them as required. For instance, disable Weekdays or specific dates on the calendar using the Disable Week Days and Disable Specific Dates options.
- Once, you’re done with Date Picker settings, move to the Time Picker settings. Here, input 60 in the Time Step field.
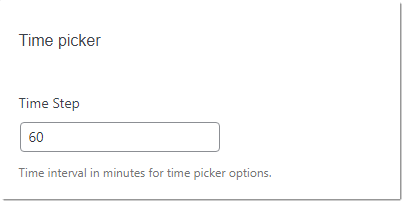
- This will make the time picker display time intervals in 1 hour as 12:00 PM, 01:00 PM, etc. If you input another number in the Time Step, then it will display the time interval according to that number. For example, you input 20, then the time interval you’ll get would be 12:00 PM, 12:20 PM, 12:40 PM, and so on.
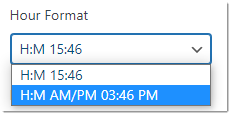
- After this, move to Hour Format, and from the dropdown menu, select H:M AM/PM 03:46 PM.
- Now, move to the Styling section and perform Typography and Background customization for your date calendar and time picker as required.
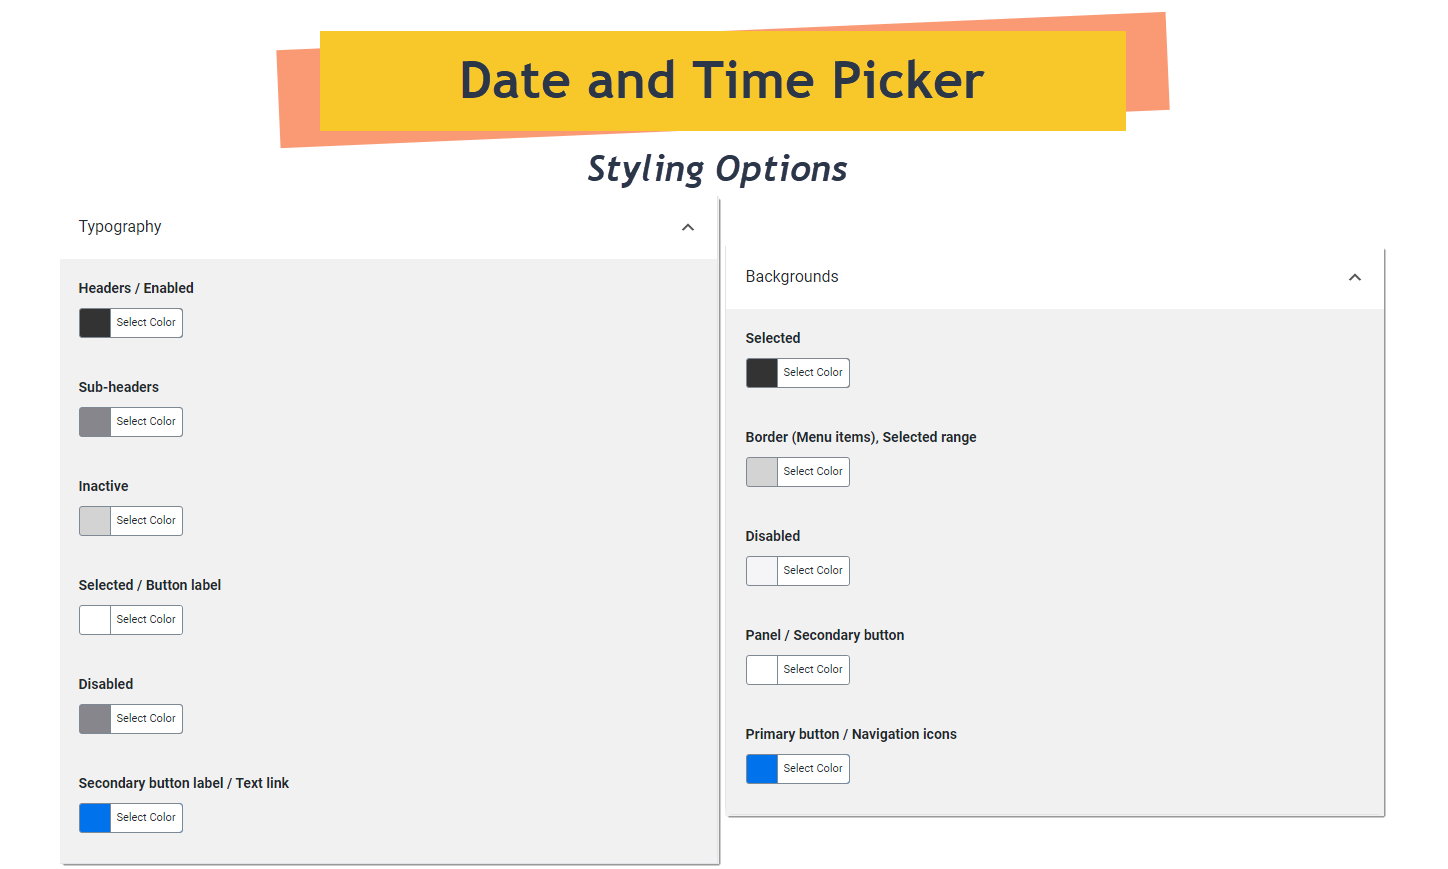
- Using the Styling option, you could make appearance customization to Headers, Sub-headers, Inactive dates, Selected dates, Disabled dates and more.
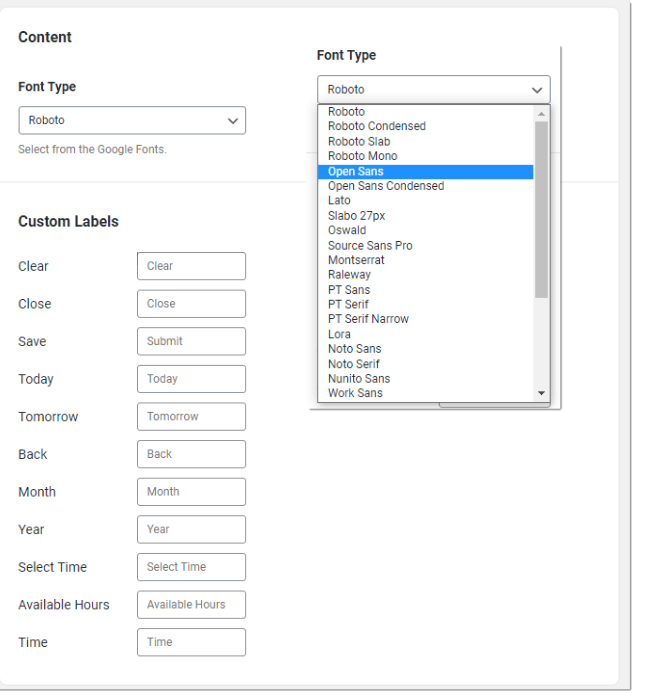
- After you’re done with Styling, move to the Content section that allows you to change font type and apply custom labels to the following.
- Once the Content setting is tweaked, go to the General settings panel and check the Display Inline option. It will show the date calendar and time picker as default when the form loads.
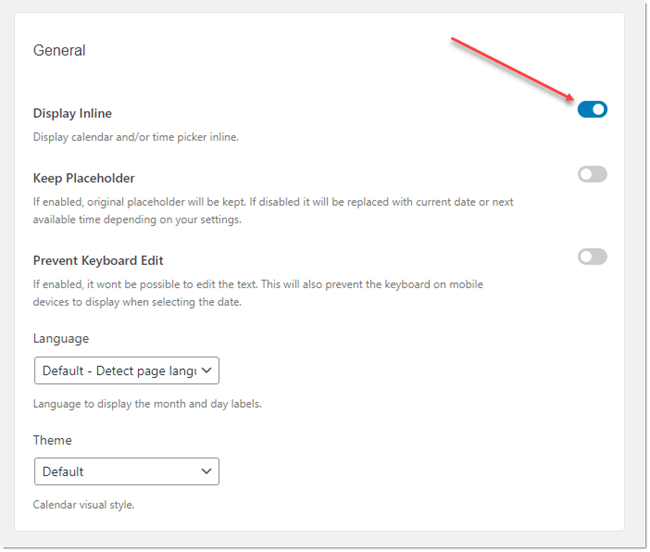
- After you’ve enabled the Display Inline option, explore other settings in the General section that allow you to perform other customizations to your date and time picker field for the travel booking system. Like, Keep Placeholder, Prevent Keyboard Edit, Language and Theme.
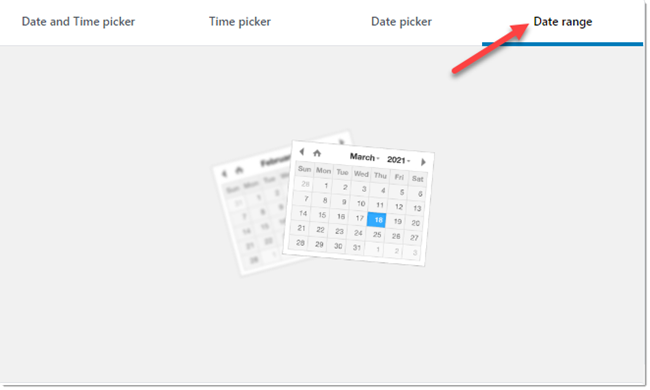
- Once you’re done making changes in the General settings, scroll all the way up and select Date Range.
- Then, in the Date Range Picker, enable Extended Date Range.
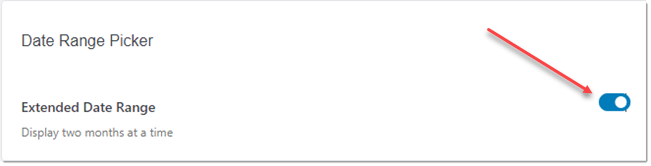
- After this, explore other settings of the Date Range Picker and apply them as you’re required. Once done making changes, go to the Publish area and click Publish.
(4) Create a Travel Booking Form
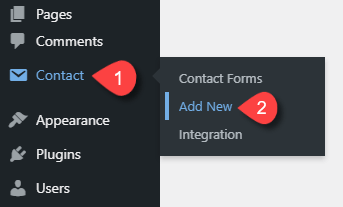
If you haven’t created a form already, then go to the Contact (on your WordPress dashboard) → Add New.
It will open the form editor with the following fields already on the form. Now, to add an input field that we will convert to date calendar and time picker, click the text at the top bar.
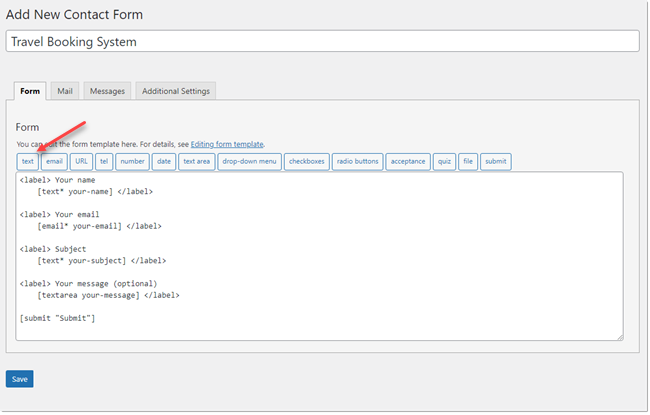
This will open a popup with options to define essential details about the field. Here, carefully enter each detail, and once everything added, click Insert tag.
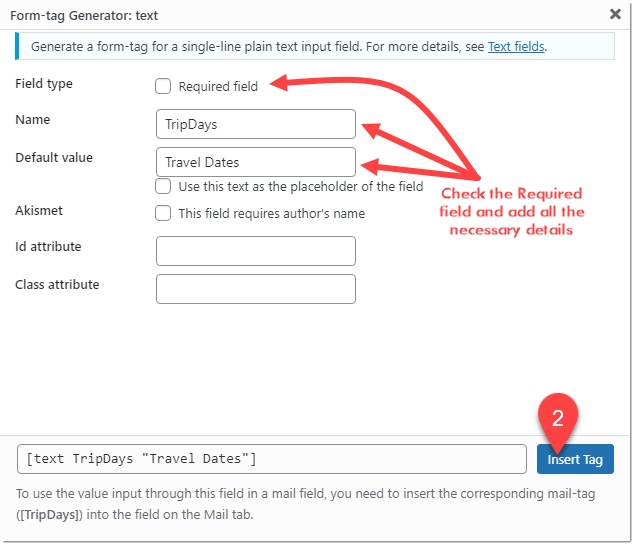
Make sure you remember the field name. Similarly, you can add other fields to your booking form that you want on the travel booking system. Such as the number of guests travelling, adults, child, hotel type and more.
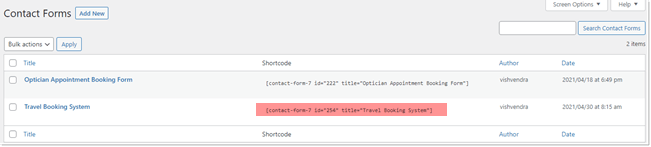
Once you’re done with additional fields, click Save. After it’s saved, copy the shortcode of your travel booking form. You can copy it right after saving the form. Or later in the contact forms window as shown in the below image.
(5) Integrate and Publish Your Travel Booking System
After creating the travel reservation form for your travel booking system, you must first integrate it with the Date and Time Picker and then publish it on a page.
(a) Integrate the Date and Time Picker with Contact Form 7
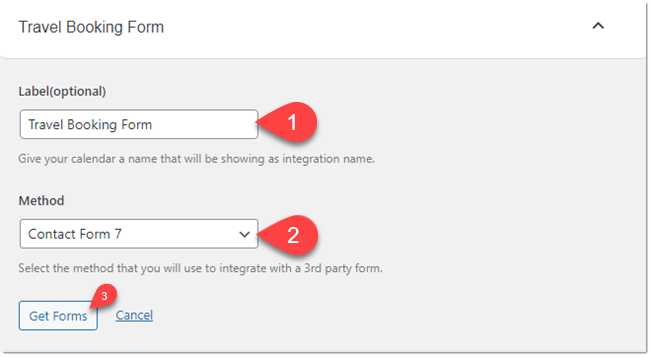
- Go to the Input WP → Integration
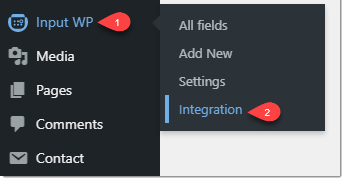
- Here, in the Contact Form section, click Add New.

- A new panel will appear that would allow you to add a custom Label for the integration. Select which form builder you want to integrate. Once you give the desired title and choose Contact Form 7, click Get Forms.
- Now, you have to select the travel booking form in the Contact Form section. Then, choose your Date and Time Picker field, and after that, select the input field you want to convert as a date calendar and time picker.
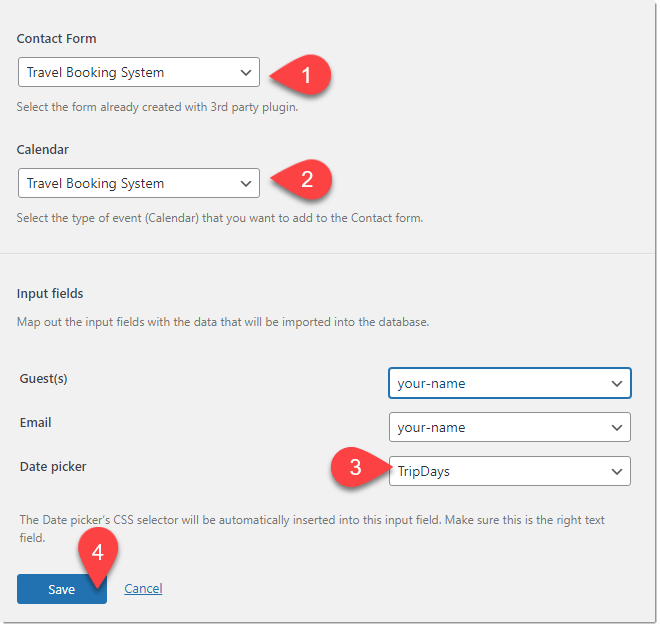
- After selecting all the necessary options, click Save and move to the next step.
(b) Publish the Travel Booking System
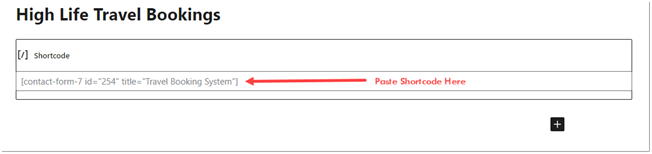
- Now, go to the page where you want to display your travel booking form and insert the Shortcode Block.
- Then, in the Shortcode Block, paste the code you’ve copied before.
- Once the code is added, simply publish your page and view it on the front end. The travel booking system on your travel agency site will work just like the below illustration.
(6) Integrate Your Travel Booking System With More Useful Tools
The above travel reservation system is simple in all senses. It will only allow customers to submit their queries with dates and time.
And you may need to call them back to discuss with them their trip thoroughly.
However, with other WordPress plugins, you can make your travel booking system more functional and effective.
The following plugins you may want to consider installing,
Conditional Fields — Using this plugin, you can provide customers with different choices for their travel.
For example, you offer road trips, destination visits and outdoor recreation activities.
So, you’d add conditions for those travel options. If they select road trips, you will show them packages from that travel options created using the Services Contact Form 7 tag.
Calculator — You’d assign different prices to the travel options and extra services. The calculator plugin will total everything on the form.
PayPal integration — Once the total is final, you can charge them directly on the form using the PayPal payment gateway integration.
Service Review — Each time they book or complete their travel, you can ask them to leave a review about their trip.
Once they do, you can show those reviews on your site to other customers to build more trust with them.
Conclusion
By following the above steps, you can easily create your travel booking system in no time with the WordPress content management system.
Moreover, the combination of Contact Form7, Date and Time Picker, and other plugins, makes your travel reservation form highly functional, effective, and ready at a low cost.
So, there’s no need for you to try something else & spend too much time and money.
Let us know how this tutorial helped you create your travel booking system. And if you’ve used the Date and Time Picker already and got some excellent suggestions, then we’re taking them in here.